Bootstrap Checkbox Example
Overview
In certain cases the elementary features might actually become quite critical-- most especially once you come to need them. As an example precisely how do your site visitors connect with the pages you create specifying a simple Boolean action-- simply just yes or no referring to a couple of the questions you have to request, the way they do accept the terms and conditions or maybe line up a handful of the practical preferences they might possess. We most likely surpass this without paying much of an attention to the feature liable for such activities however the Bootstrap Checkbox Class is certainly a pretty serious element-- one our forms can't actually do without.
Located in the most updated fourth version of the Bootstrap framework we are presented with the
.form-check.form-check-label<div>.form-check.form-check-label<label><input>.form-check-inputSteps to use the Bootstrap checkbox:
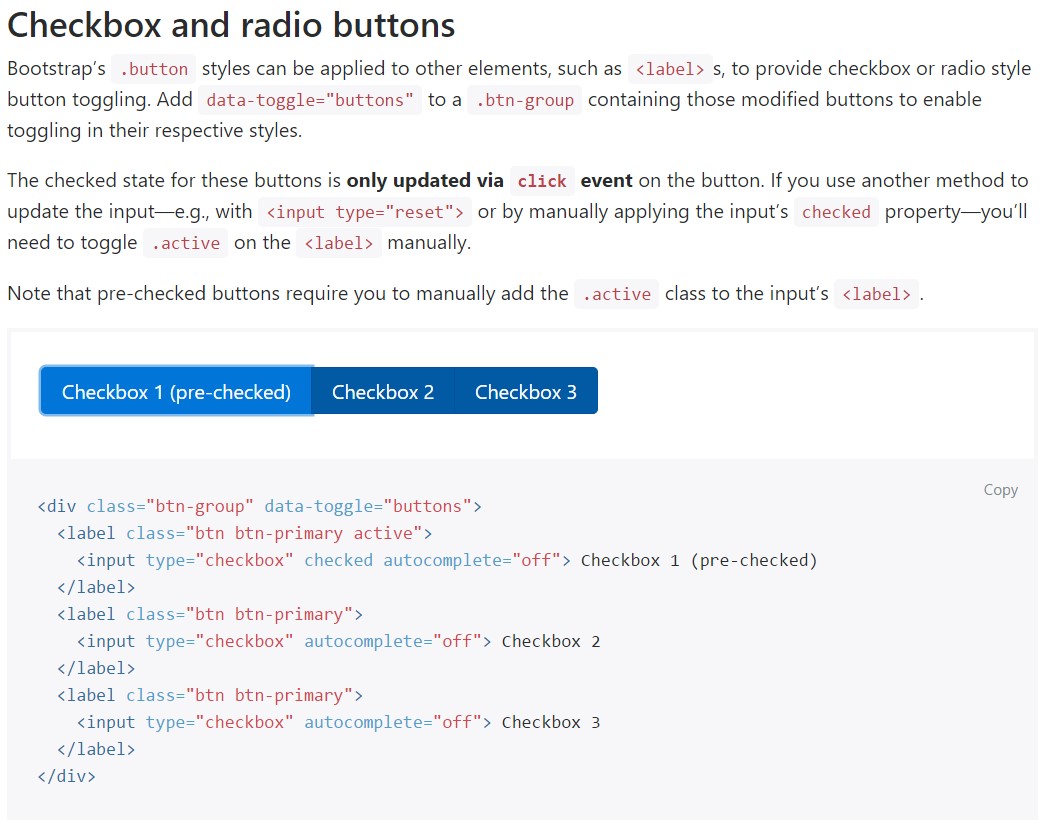
The checked state for these buttons is only updated via click event on the button.

<div class="btn-group" data-toggle="buttons">
  <label class="btn btn-primary active">
    <input type="checkbox" checked autocomplete="off"> Checkbox 1 (pre-checked)
  </label>
  <label class="btn btn-primary">
    <input type="checkbox" autocomplete="off"> Checkbox 2
  </label>
  <label class="btn btn-primary">
    <input type="checkbox" autocomplete="off"> Checkbox 3
  </label>
</div>
Sometimes we want to have the checkboxes to take place in our forms without the site visitor actually can bring some action clicking them-- that is definitely where exactly the disabled option shows up.
To disable effectively a checkbox in Bootstrap 4 utilizing the typical HTML attribute
disabledIn case that you really like the idea and simply would like to work on this you need to assign the
.disabled.form-checkSome other situation
Anytime you are utilizing checkboxes, wrap them in a
<label>.custom-control.custom-checkboxEmploy
.custom-control-input<input>Also put into action two
<span>.custom-control-indicator.custom-control-description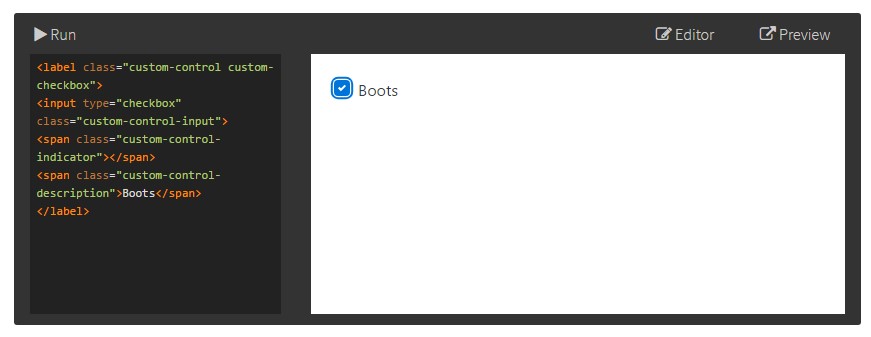
<label class="custom-control custom-checkbox">
<input type="checkbox" class="custom-control-input">
<span class="custom-control-indicator"></span>
<span class="custom-control-description">Boots</span>
</label>
Bootstrap Checkbox Design forms
Default radios and checkboxes are developed upon with the help of
.form-checkThe disabled class is going to also make lighter the text message color tone to help signify the input's state.
A brand new thing for the Bootstrap version 4 framework is the initiation of the so called custom made form components. These are the identical features we are used to inside practicality although designated a lot more attractive and in the Bootstrap manner. By using them you can put in amazing taste as well as style to your content by simply just appointing a few additional classes to the commands you incorporate in your forms.
In order to work with custom checkboxes wrap them in a
<label>.custom-control.custom-checkbox<input>.custom-control-input<span>.custom-control-indicator.custom-control-descriptionConclusions
That's basically everything you must handle in order to insert a checkbox feature for your Bootstrap 4 powered site and add some custom flavor to it adding it a nice looks. And now everything you need to do is repeat the drill until you've examined all of the checkboxes required are readily on the web page.
Review a couple of video clip tutorials relating to Bootstrap checkbox
Linked topics:
Bootstrap checkbox main documentation
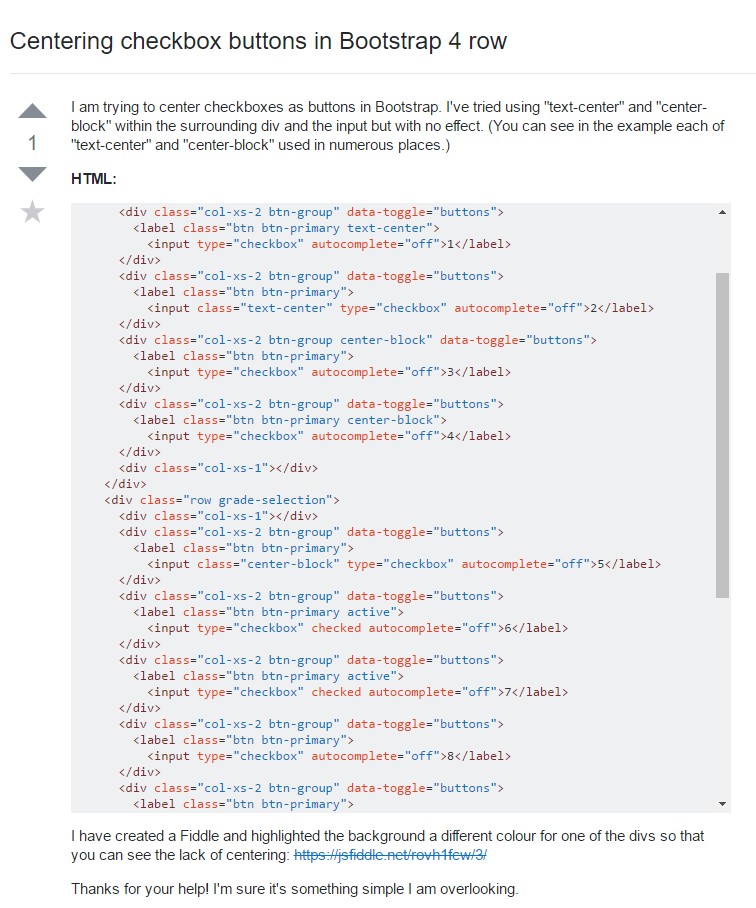
Centering checkbox buttons in Bootstrap 4 row
Make checkbox always visible in Bootstrap 4
